Backblaze B2 is almost the cheapest online storage now. For more introductions, please refer to Backblaze B2’s official site.
Add Backblaze B2 in iPic
Open iPic’s Preferences, clicks Image Host, and add Backblaze B2.
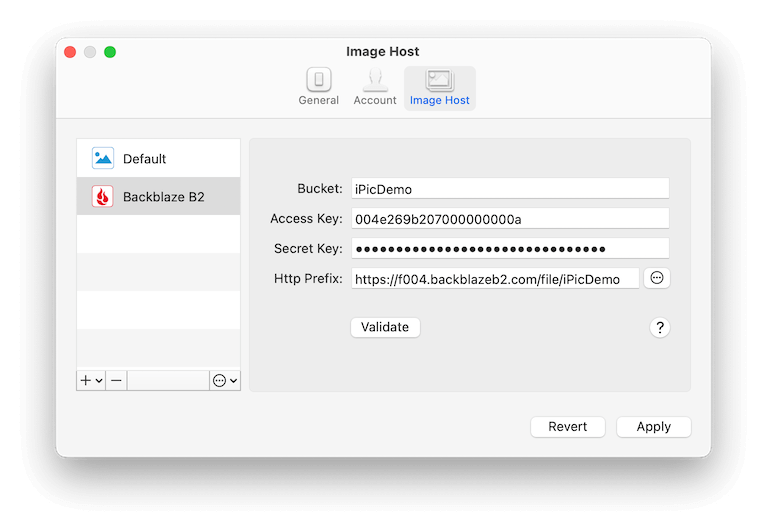
Here is the introductions for all parts:
Bucket- Same with the bucket in Backblaze B2
- 注意:添加
Bucket时,权限需要选择Public,不然别人无法访问,则无法作为图床使用。
- 注意:添加
- Note: when create
Bucket, should set theFile in BucketasPublic, otherwise users can’t access the image inBucketvia url.
Access KeyandSecret Key- They’re the
keyIDandapplicationKeyof Backblaze B2 Application Key. Refer to Backblaze B2’s Application Keys. - Note: When create the App Key, should include the
Writepermission at least.
- They’re the
Http Prefix- The endpoint for Backblaze B2 bucket, e.g., https://f004.backblazeb2.com/file/iPicDemo
After fill all the parts, clicks the Validate button. If all the information above is correct, you can see the link of Passed in the right.