Backblaze B2 is almost the cheapest online storage now. For more introductions, please refer to Backblaze B2’s official site.
Add Backblaze B2 in iPic
Open iPic’s Preferences, clicks Image Host, and add Backblaze B2.
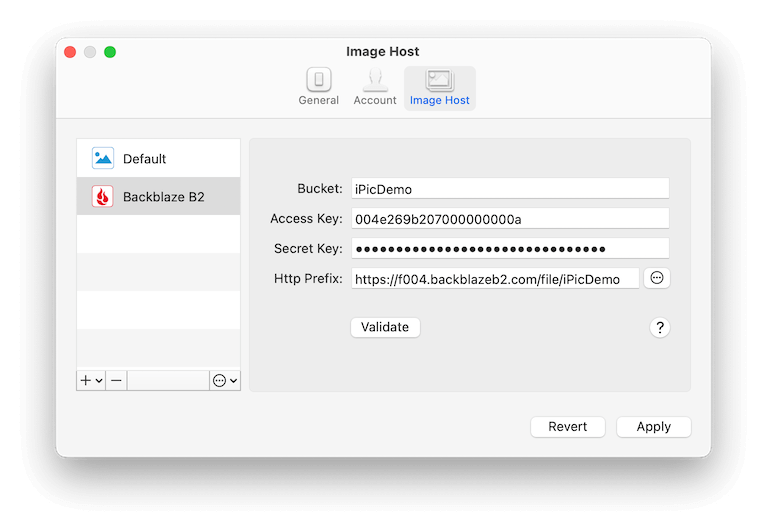
Here is the introductions for all parts:
Bucket- Same with the bucket in Backblaze B2
- Note: when create
Bucket, should set theFile in BucketasPublic, otherwise users can’t access the image inBucketvia url.
Access KeyandSecret Key- They’re the
keyIDandapplicationKeyof Backblaze B2 Application Key. Refer to Backblaze B2’s Application Keys. - Note: When create the App Key, should include the
Writepermission at least.
- They’re the
Http Prefix- The endpoint for Backblaze B2 bucket, e.g., https://f004.backblazeb2.com/file/iPicDemo
After fill all the parts, clicks the Validate button. If all the information above is correct, you can see the link of Passed in the right.
Beside the basic configuration above, Backblaze B2 also supports several advanced ones. Click the ‘Advanced’ button in right of Http Prefix, you can see the following setting page.
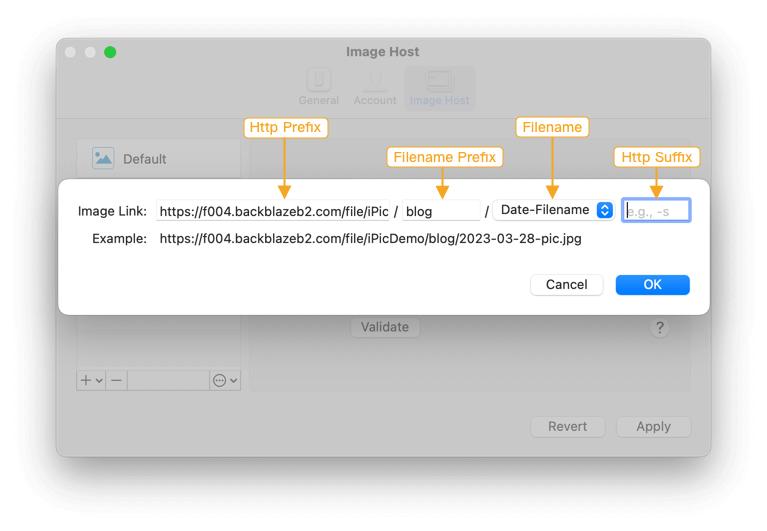
Http Prefix- Same with what ever introduced.
Filename Prefix- Could understand as the folder in Backblaze B2
- For example, if you want iPic upload all images in
blogfolder, just inputbloghere. The image link will like https://f004.backblazeb2.com/file/iPicDemo/blog/pic.jpg - Note: If you enable
File name prefixwhen create App Key, theFilename Prefixkey should includes theFile name prefixat least.
Filename- The filename saved in Backblaze B2. Now iPic supports these 3 kinds of filename.
Only Filenamee.g.,pic.jpgDate-Filenamee.g.,2023-06-16-pic.jpgRandome.g.,jk8l1.jpg, could help to shorten the link.
Http Suffix- Any characters in the end of the link.
After all, clicks Apply to save.